
I always despise taking down my Christmas wreath because I have never had anything to put in its place. Last year, my front door was bare until I made my Spring Wreath. My DIY winter wreath is the easiest, simplest wreath I have ever made. It is really as easy as 1-2-3! I started with my supplies….I wasn’t really sure what my wreath was going to look like.
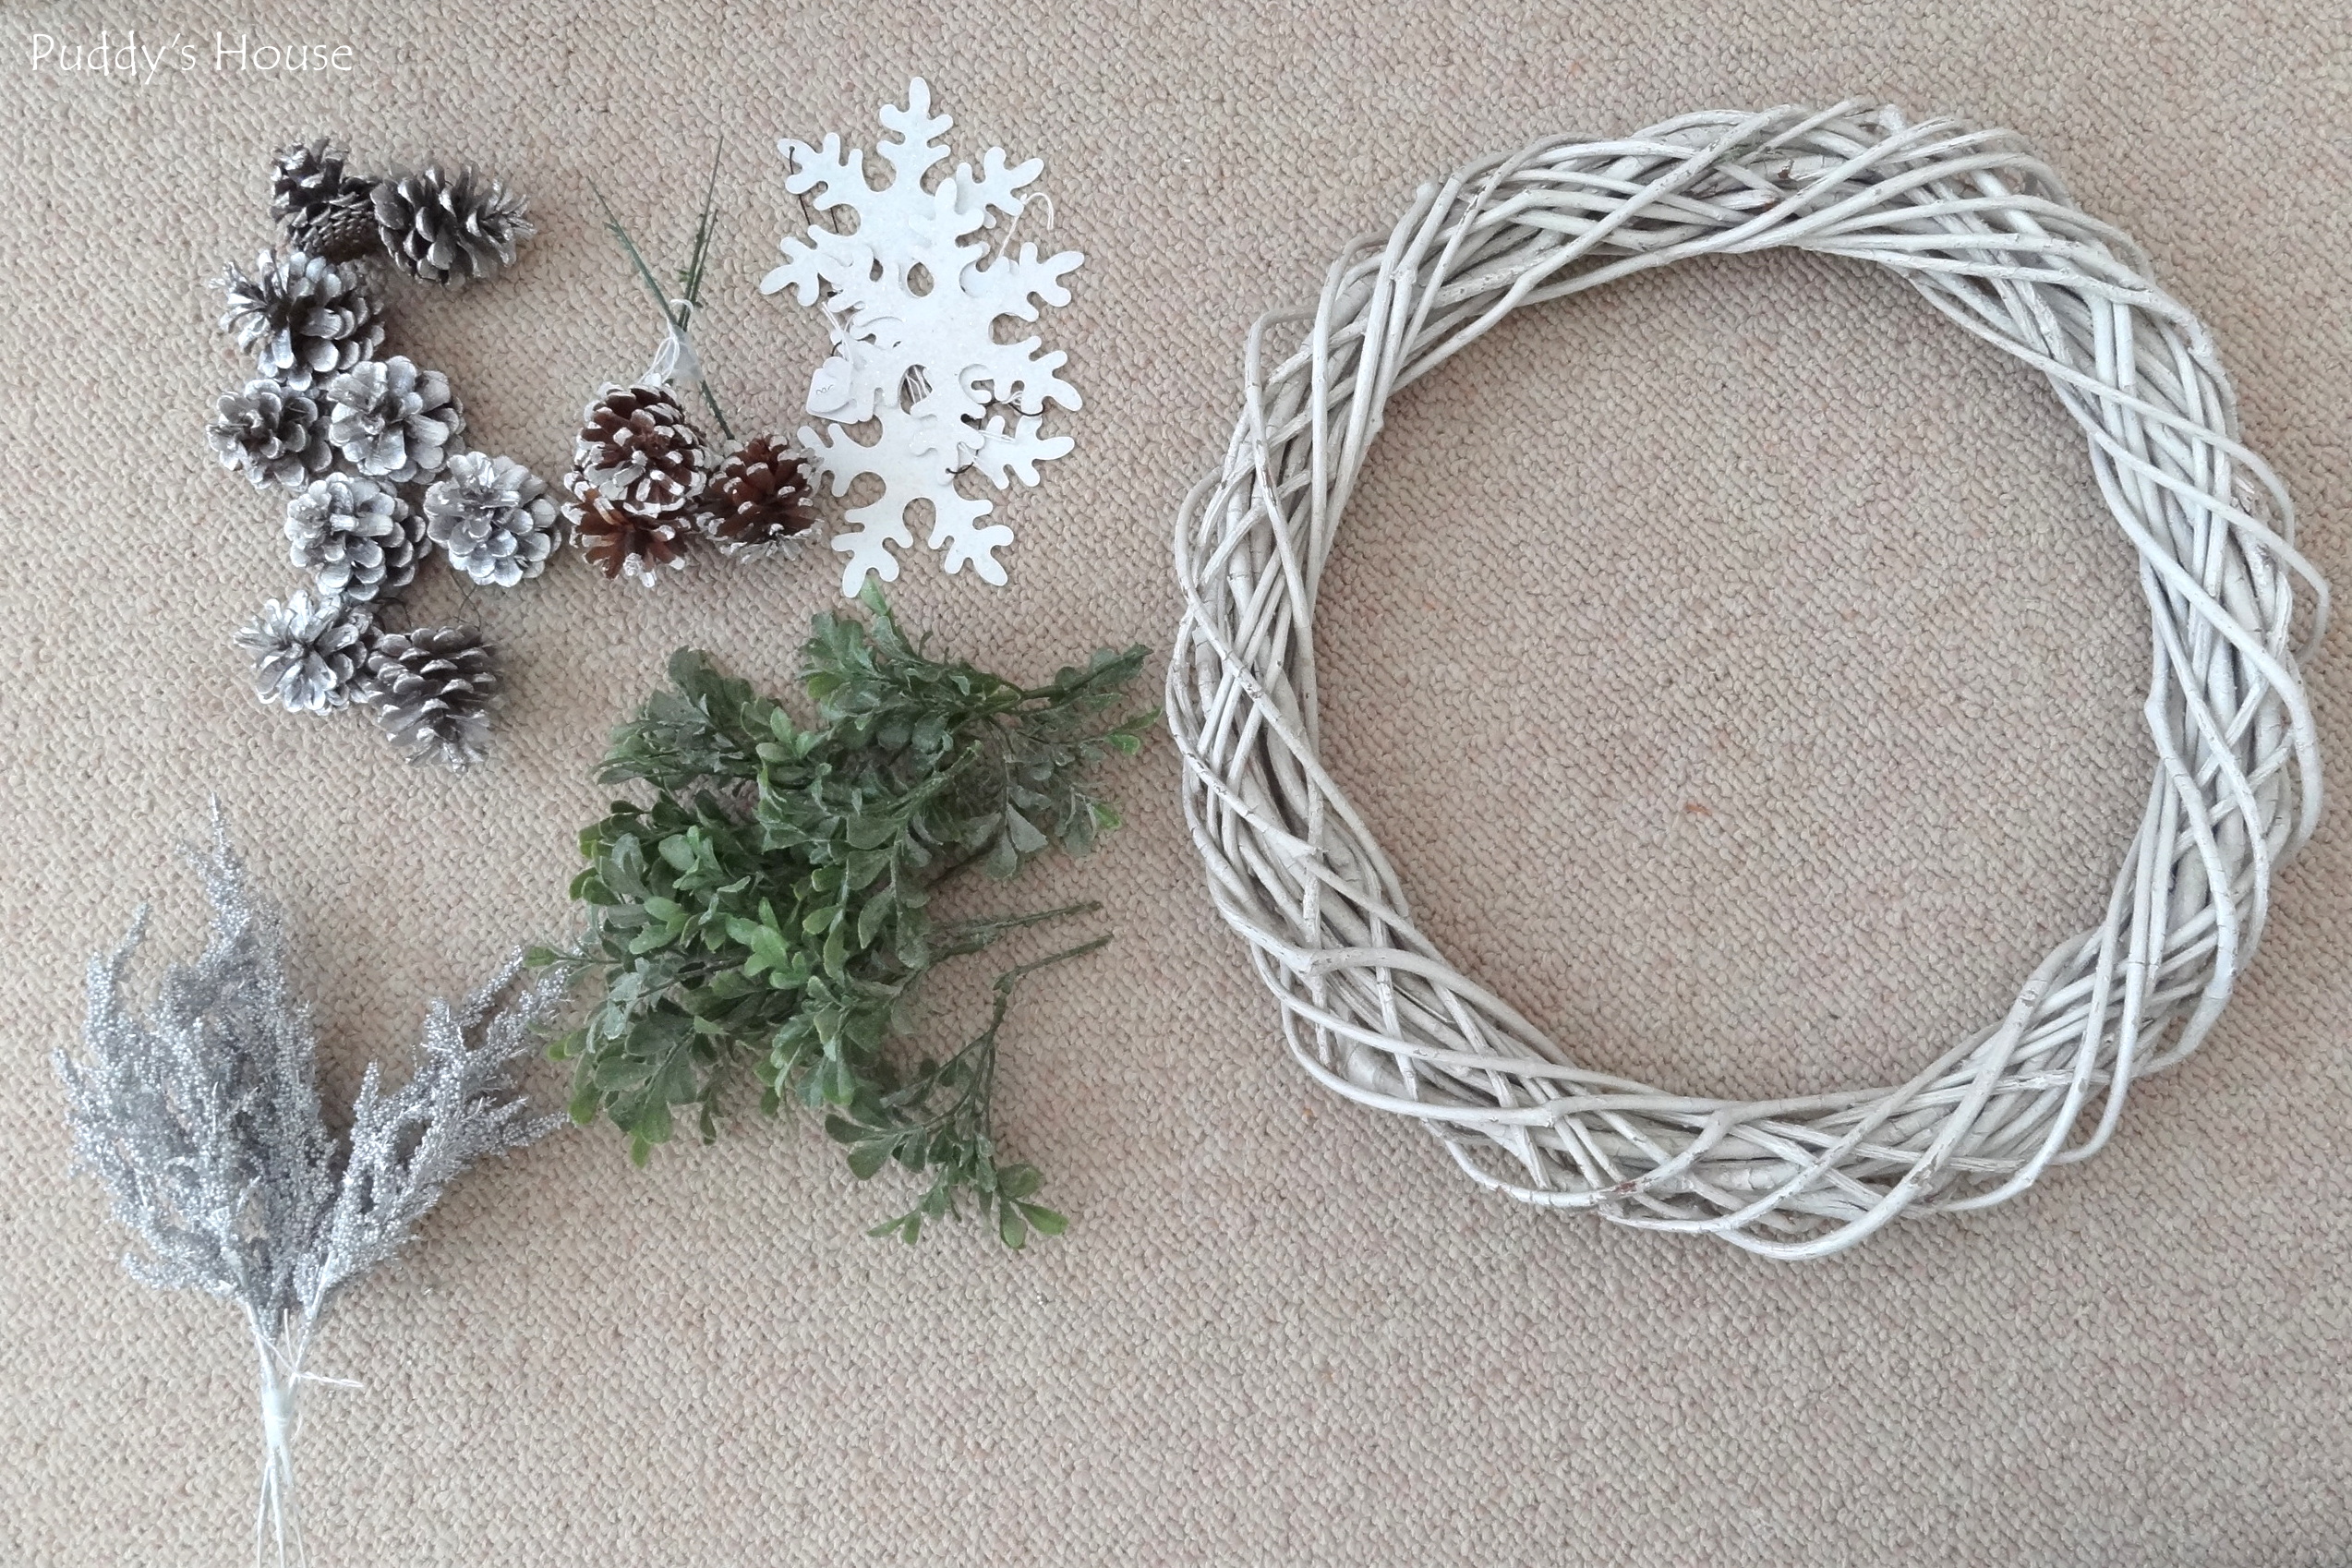
I had the white painted grapevine wreath in my supplies – it was used in one of the DIY Christmas Wreaths that I shared. I thought the white base would be good for winter. Fortunately, I had only tucked in the greenery so it was very easy to disassemble. I kept out the greens that have a bit of a white coating on them (not really sure what they are or how to describe them any better….sorry!). My other supplies, included the silvery berry stems which I bought for less than $1 at the thrift store. I also bought the 3 pine cone picks at the thrift shop for less than $.50. The metal snowflake ornaments were from the thrift shop too, I think they were $1 each. And, the silver pine cones I had in my Christmas supplies. You can see from the finished product above that I didn’t use everything I got out, but that happens. I normally make very full wreaths, but I thought for Winter it would be nice to have a change and not completely cover the grapevine wreath. And, like I said this was 3 simple steps.
1 – I started with the greenery and just filled one small section of the wreath. I liked it as the base.

2 – I added the 3 silvery berry branches. The picks made them easy to tuck in the grapevine and they separated and bent nicely to mix in with the greenery.
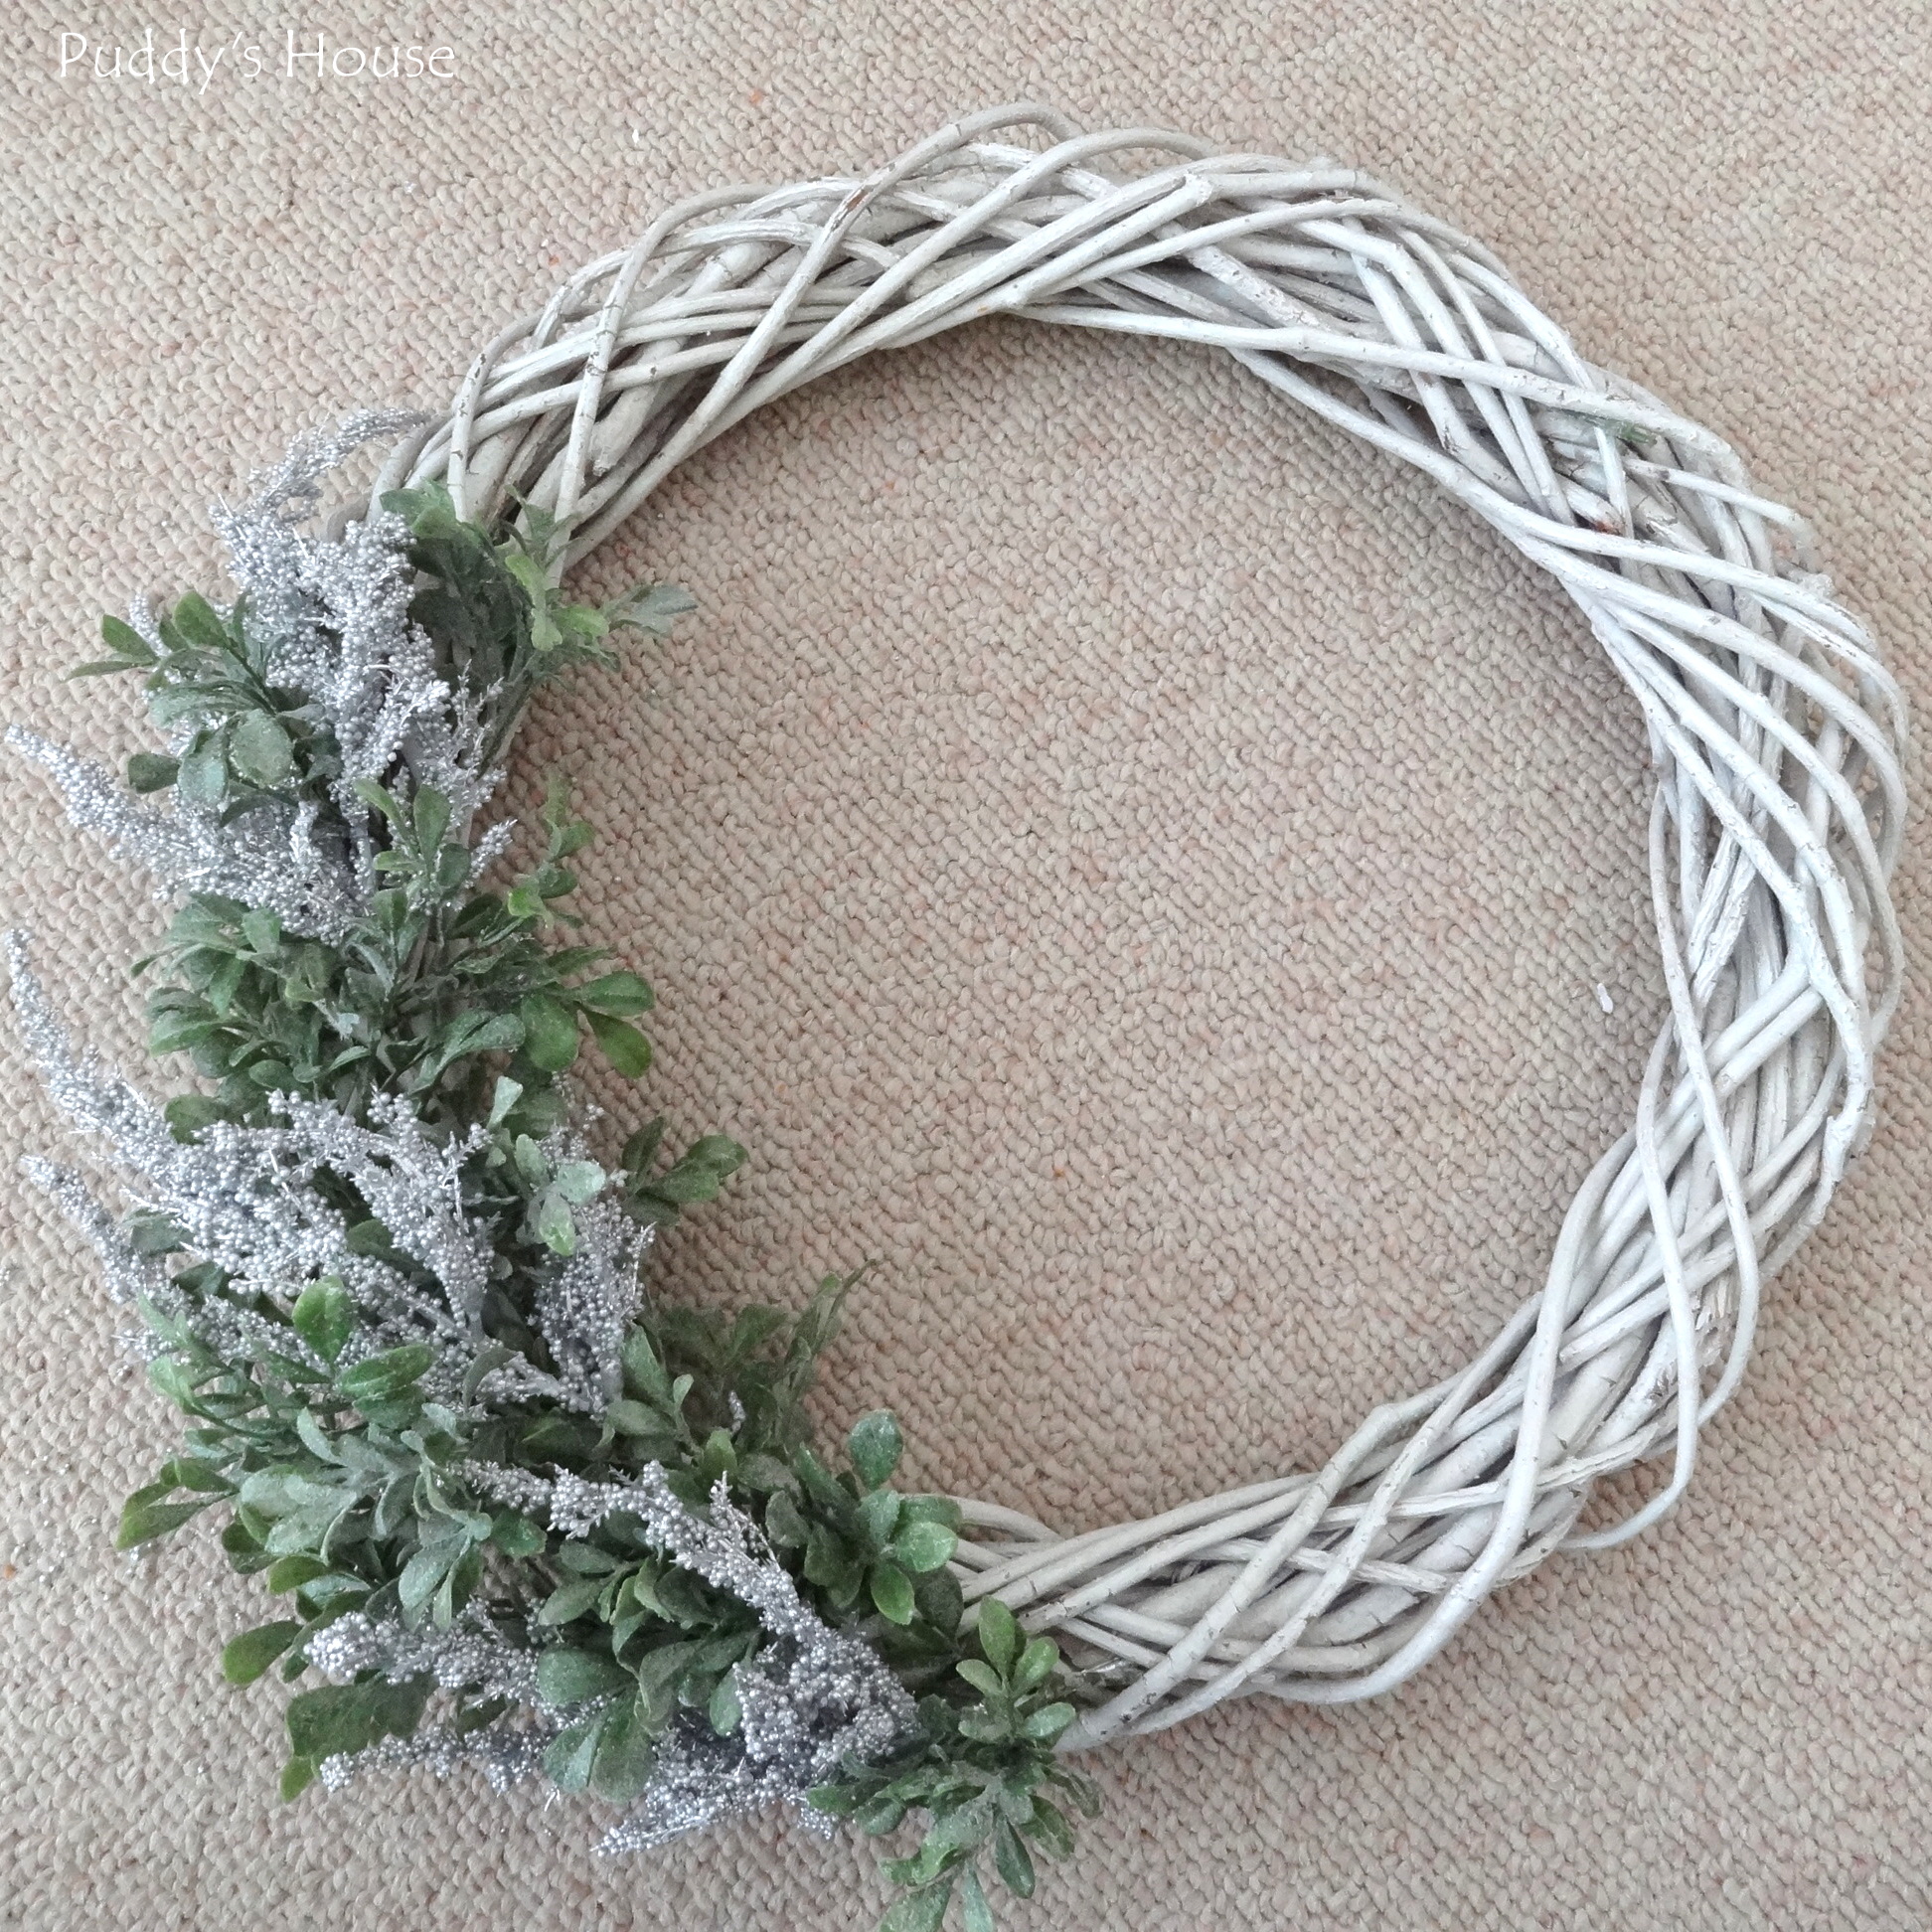
3 – I added the pinecones. This was so easy, I actually took the wreath and hung it on the door before taking a picture of this step.

I really took it out there to see if I liked it on the door. I knew I liked the look but sometimes it is hard to tell if I will like it on our dark brown door. But, I did so I called it done. The three elements of the wreath work really nicely together. And, I didn’t glue anything in place so I can always change it for the next season if I want, or I can keep it this way for next year.

It is just perfect to have at touch of Winter greeting everyone on the front door.

So, do you have a winter wreath? I showed my friend a picture of it this week and she said she might have to copy it, and I told her to go right ahead. That is precisely why I share, to show anyone can do it, and to provide some inspiration for you.


Leslie, this is very timely for me – we just got a new front door and I have nothing to hang on it. Your winter wreath actually looks like something I could do- thanks! Btw, I found you through the Blog U FB page – looking forward to meeting you in June!
Dana,
Thank you! I’m sure you can put together a nice wreath for your new front door!! Look forward to meeting you too!
Leslie
My Christmas wreath is still up, for that very same reason! With your help, I’ll bet I could pull this off. Pinning!
Thanks Amy!! I’m sure you can pull something together that will look great!!
Hi Leslie, your wreath is absolutely beautiful and I will plan on making it for the holidays:-) Thanks so much for sharing.
Aww, thanks so much Lesley!!
Luv the Winter Wreath, So I am going to try & make 1 for myself & 1 as a gift for someone?! I Believe That Homemade Gift R The Best Bcuz, They Come From The Heart
Hi Leslie your wreath is very pretty and says “winter” all over!! so nice and i can’t wait to make it. Thank you for sharing!
So glad you were inspired to make one too! I’d love to see a picture of yours when you are done.
Leslie
Thank you!!:) I will!